Liferay 7.4のリモートアプリを試しました - Liferay 7.4のリモートアプリを試しました - aegif Labo Blog Liferay
null Liferay 7.4のリモートアプリを試しました
Liferay7.4の新機能のリモートアプリはご存知でしょうか。
公式blog でも紹介しています。
今回はこのあたりを触りたいと思います。また、この記事はupdate6を基準に書いています。
公式blogの内容
早速ですが、ひとまず公式blog記事を読みましょう。
"You will need a React App running to test it... My React App will be running at http://localhost:3000"
はい、リモートアプリのアプリはこのReact Appのことですね。
"Update you index.js file to have an added WebComponent to your application with the ElementId that you'll configure in Liferay"
class WebComponent extends HTMLElement {
     connectedCallback() {
          ReactDOM.render(<App/>, this);
     }
}

const ELEMENT_ID = 'remote-age-app';
if (!customElements.get(ELEMENT_ID)) {
     customElements.define(ELEMENT_ID, WebComponent);
}
index.jsを更新し、WebComponentを追加するのですね。
では元のindex.jsを参照しましょう: https://github.com/cdmsantos/liferay-remote-app-example/tree/main/first-project-original/src
ReactDOM.render(<App />, document.getElementById('root'));
なるほど、元のReactDOM.renderをWebComponentクラスに書き換えるのですね。
この書き方はReact公式ドキュメントのWeb ComponentsからReactを呼ぶサンプルとそっくりではないですか?
はい、
https://ja.reactjs.org/docs/web-components.html#using-react-in-your-web-components
まったく同じです。すなわち、Liferay側はWeb Componentsテクノロジーを介してリモートのReactJSアプリを呼ぶのですね。
では、Liferay側の設定を確認する前に、公式blogのサンプルをビルドしましょう。
git clone https://github.com/cdmsantos/liferay-remote-app-example.git
cd liferay-remote-app-example/first-project-liferay
npm install
npm run build
このサンプルはreact-scriptsで作成されるため、webpackが生成したchunkファイルをchunkhashなしのファイル名にコピーするrename-chunks.shが必要です。
その結果、./build/static/jsの下に、Reactアプリに必要であるmain.js、2.jsとruntime-main.jsが作成されます。
npm start
react-scriptsが作成したReactプロジェクトならnpm startでローカルのHttpサーバを稼働させ、localhost:3000でアクセスできます。できた画面はこうなります。
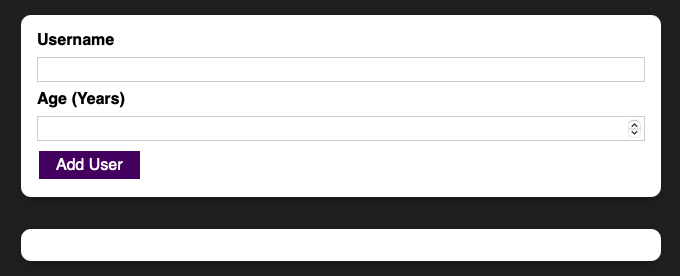
続いて、公式blogのLiferayからサンプルAPPを利用する部分を読みましょう。
"By adding a new Remote App you will have the following fields: "
Liferayにアクセスして、コントロールパネル > リモートアプリケーション を開き、 「+」ボタンをクリックして、リモートアプリケーションを追加します。 以下のように設定します。
"Name: Age App
Type: Custom Element(種類:カスタム要素)
HTML Element Name: remote-age-app
URL: localhost:3000/static/js/main.js
URL:localhost:3000/static/js/2.js
URL:localhost:3000/static/js/runtime-main.js
CSS: localhost:3000/static/css/main.css
Portlet Category Name: Remote Apps(ポートレットのカテゴリ名:リモートアプリケーション)"
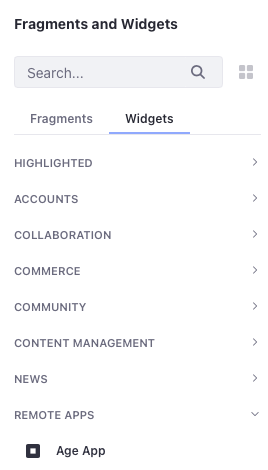
以上のステップに従って完成すると、Liferayページ編集のWidget/Remote Appsの下に、Age Appが現れます。
Age AppをLiferayの画面上に置くと、localhost:3000上のReact APPが表示されました!
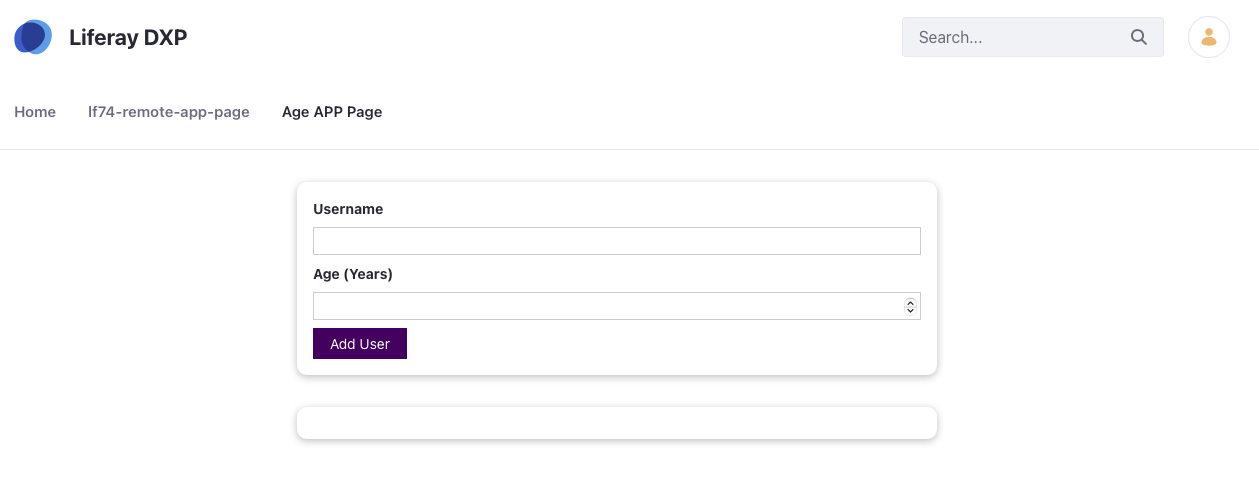
Remote Appの本体
では、LiferayのRemote Appは一体どんな物なのかを考察しましょう。
まずはブラウザーの開発者ツールで、表示されたリモートアプリを確認してみます。

以下の部分に注目しましょう:
<div class="portlet-body">
  <remote-age-app liferaywebdavurl="http://localhost:8080/webdav/guest/document_library">
    <div>
      ...
    </div>
  </remote-age-app>
</div>
class="portlet-body": リモートアプリはポートレットとして描画されます<remote-age-app>: さきほどのReactのindex.jsを更新する際、customElements.define('remote-age-app', WebComponent);でWebComponentというWeb Componentsスペックのクラスを描画するカスタマエレメントです
では、<remote-age-app>エレメントにWeb Componentsクラスを描画するjsスクリプトの位置を特定しましょう。開発ツールでstatic/js/main.jsを検索すると

はい、ここまで見てきたリモートアプリの本体は、リモートのjavascriptを読み込んで、Liferayのページ上のカスタムエレメントにJSアプリを描画するポートレットです。
このポートレットの仕組みはどうでしょうか。さらにソースコードを探しましょう。
まず、リモートアプリを表示するためのポートレットを確認してみます。https://github.com/liferay/liferay-portal/blob/7.4.x/modules/apps/remote-app/remote-app-web/src/main/java/com/liferay/remote/app/web/internal/portlet/RemoteAppEntryPortlet.java
public void render(
RenderRequest renderRequest, RenderResponse renderResponse)
throws IOException {
String type = _remoteAppEntry.getType();
if (type.equals(RemoteAppConstants.TYPE_CUSTOM_ELEMENT)) {
_renderCustomElement(renderRequest, renderResponse);
}
...
}
private void _renderCustomElement(
RenderRequest renderRequest, RenderResponse renderResponse)
throws IOException {
PrintWriter printWriter = renderResponse.getWriter();
printWriter.print(StringPool.LESS_THAN);
printWriter.print(_remoteAppEntry.getCustomElementHTMLElementName());
Properties properties = _getProperties(renderRequest);
// ここまでの出力 <remote-age-app
try {
...
StringBundler webDavURLSB = new StringBundler(4);
...
properties.put("liferaywebdavurl", webDavURLSB.toString());
// ここまでの出力 <remote-age-app liferaywebdavurl="xxxx"
}
for (Map.Entry<Object, Object> entry : properties.entrySet()) {
printWriter.print(StringPool.SPACE);
printWriter.print(entry.getKey());
printWriter.print("=\"");
printWriter.print(
StringUtil.replace(
(String)entry.getValue(), CharPool.QUOTE, """));
printWriter.print(StringPool.QUOTE);
// ここまでの出力
// <remote-age-app liferaywebdavurl="xxx" attr="value"
}
printWriter.print("></");
printWriter.print(_remoteAppEntry.getCustomElementHTMLElementName());
printWriter.print(StringPool.GREATER_THAN);
// ここまでの出力
// <remote-age-app liferaywebdavurl="xxx" attr="value"></remote-age-app>
printWriter.flush();
}
なるほど、リモートアプリポートレット本体は、リモートアプリの情報を持っているRemoteAppEntryのcustomElementHTMLElementName属性の値を用いてカスタムHTMLエレメントを出力しているだけです。
前例のHTML Element Nameはremote-age-appなので、出力されたHTMLエレメントは<remote-age-app>になります。
また、そのカスタムエレメントの属性はliferaywebdavurlとRemoteAppEntryのpropertiesで構成されており、propertiesの部分はattr="value"の形でカスタムエレメントに出力されます。
しかし、ここまで読むと、RemoteAppEntryPortletはエレメントのみを画面上に出力します。
リモートのjavascriptを読み込むこともしないし、このポートレット自身は@ComponentアノテーションがないためOSGIのコンポーネントになっていません。
では、remote-app-webの中に、RemoteAppEntryのjavascript URLを利用するコードを探しましょう。
はい、RemoteAppEntryDeployerImpl.javaです。
以下のコードに注目しましょう。
@Override
public List<ServiceRegistration<?>> deploy(RemoteAppEntry remoteAppEntry) {
  List<ServiceRegistration<?>> serviceRegistrations = new ArrayList<>();

  ...
  serviceRegistrations.add(_registerPortlet(remoteAppEntry));
  ...
}

private ServiceRegistration<Portlet> _registerPortlet(
        RemoteAppEntry remoteAppEntry) {

  Dictionary<String, Object> dictionary =
    HashMapDictionaryBuilder.<String, Object>put(
      "com.liferay.portlet.company", remoteAppEntry.getCompanyId()
    ).put(
      "com.liferay.portlet.css-class-wrapper", "portlet-remote-app"
    ).put(
      "com.liferay.portlet.display-category",
      _getPortletCategoryName(remoteAppEntry)
    ).put(
      "com.liferay.portlet.instanceable",
      remoteAppEntry.isInstanceable()
    ).put(
      "javax.portlet.display-name",
      remoteAppEntry.getName(LocaleUtil.US)
    ).put(
      "javax.portlet.name", _getPortletId(remoteAppEntry)
    ).put(
      "javax.portlet.security-role-ref", "power-user,user"
    ).build();

  if (Objects.equals(
      remoteAppEntry.getType(),
      RemoteAppConstants.TYPE_CUSTOM_ELEMENT)) {
    String customElementURLs = remoteAppEntry.getCustomElementURLs();
    dictionary.put(
      "com.liferay.portlet.footer-portal-javascript",
      customElementURLs.split(StringPool.NEW_LINE));
    String customElementCSSURLs =
      remoteAppEntry.getCustomElementCSSURLs();
    if (Validator.isNotNull(customElementCSSURLs)) {
      dictionary.put(
        "com.liferay.portlet.footer-portal-css",
        customElementCSSURLs.split(StringPool.NEW_LINE));
    }
  }

  return _bundleContext.registerService(
    Portlet.class,
    new RemoteAppEntryPortlet(_npmResolver, remoteAppEntry),
    dictionary);
}
RemoteAppEntryをdeployする際、そのOSGIサービスはremote-app-webバンドルに当該RemoteAppEntryの情報を用いてPortletサービスを登録します。
これがベースクラスであるRemoteAppEntryPortlet自身はOSGIコンポーネントではない理由です。
以上のコードを読むと、当該ポートレットの情報もわかります。_registerPortletメソッドのdictionary部分の効果はLiferayポートレットを作成するときの@Componentアノテーションの中身と同じです。@Componentで書くと、以下になります。
@Component(
  service = Portlet.class,
  property = {
    "com.liferay.portlet.company=...",
    "com.liferay.portlet.css-class-wrapper=portlet-remote-app",
    ...
    "javax.portlet.display-name=Age App",
    "javax.portlet.name=com_liferay_remote_app_web_internal_portlet_RemoteAppEntryPortlet_xxxx",
    "com.liferay.portlet.footer-portal-javascript=url1,url2,url3,...",
    "com.liferay.portlet.footer-portal-css=url1,url2,url3,..."
  }
)
gogo shellでも上記情報の登録を確認できます。
g! lb | grep 'Remote App Web'
  437|Active     |   15|Liferay Remote App Web (2.0.20)|2.0.20
g! b 437 | grep Age
    {javax.portlet.Portlet}={com.liferay.portlet.css-class-wrapper=portlet-remote-app, service.id=19557, service.bundleid=437, service.scope=singleton, com.liferay.portlet.display-category=category.remote-apps, com.liferay.portlet.footer-portal-javascript=[http://localhost:3000/static/js/main.js,http://localhost:3000/static/js/2.js,http://localhost:3000/static/js/runtime-main.js], javax.portlet.display-name=Age App, com.liferay.portlet.footer-portal-css=[http://localhost:3000/static/css/main.css], com.liferay.portlet.company=39044, javax.portlet.security-role-ref=power-user,user, javax.portlet.name=com_liferay_remote_app_web_internal_portlet_RemoteAppEntryPortlet_45056, com.liferay.portlet.instanceable=false}
では、RemoteAppEntryDeployer.deploy()メソッドを呼ぶ場所を特定しましょう: https://github.com/liferay/liferay-portal/blob/7.4.x/modules/apps/remote-app/remote-app-service/src/main/java/com/liferay/remote/app/service/impl/RemoteAppEntryLocalServiceImpl.java
public RemoteAppEntry updateStatus(
    long userId, long remoteAppEntryId, int status)
  throws PortalException {

  if (status == WorkflowConstants.STATUS_APPROVED) {
    remoteAppEntryLocalService.deployRemoteAppEntry(remoteAppEntry);
  }
  ...
}

public void deployRemoteAppEntry(RemoteAppEntry remoteAppEntry) {
  ...
  _serviceRegistrationsMaps.put(
    remoteAppEntry.getRemoteAppEntryId(),
    _remoteAppEntryDeployer.deploy(remoteAppEntry));
}
すなわち、リモートアプリの公開と同時にLiferayポートレットが作成されます。ここまで、リモートアプリの全容を把握できました。
- リモートアプリの登録後、
remote-app-webバンドルの中にLiferayポートレットが登録される - 当該ポートレットはLiferayページにエレメント名を用いてカスタムエレメントを作成する
- 当該ポートレットが表示される場合、Liferayページの
footerに、リモートjsファイル導入用の<script>とリモートcssファイル導入用の<style>エレメントを追加する - 上記スクリプトが正しくロードされた後に、カスタムエレメントにWeb Components技術を利用しアプリを作成する
簡単にいえば、外部のJSをLiferayのページに導入して実行させることです。
ディスカッション
そうすると、いくつ問題があるので、もう少し考察しましょう。
Custom Element Nameの有効性
RemoteAppEntryエンティティにはバリデーションが付いていませんが、remote-app-webのAdminポートレットに<aui:validator name="customElementName" />というフロントエンドバリデーションがあります。
- ちなみに
"customElementName"は7.4のaui:validatorの仕様です。frontend-js-aui-webのソースを確認すると有効なカスタムエレメント名は^[a-z]([a-z]|[0-9]|-|\.|_)*-([a-z]|[0-9]|-|\.|_)*regexを満たす必要があります。 - 簡単にいえば以下のことになります
- aaa-bbb-cccのような小文字と数字と記号(-._)の組み合わせ
- 必ずハイフンがある
- 普通のhtmlエレメント名div、spanなどは使えません
Web Componentsのブラウザーサポート
https://developer.mozilla.org/ja/docs/Web/Web_Components#ブラウザーの互換性
- ウェブコンポーネントは、Firefox (バージョン 63)、Chrome、Opera、Edge (バージョン 79) が既定で対応しています。
- Safari では、いくつかのウェブコンポーネントの機能に対応していますが、上記のブラウザーよりも限定的です。
プレーンJSで利用できるのか
Web Componentsテクノロジーを利用すれば、customElements.define(target, component)で指定カスタムエレメントに描画できます。なら、プレーンjavascriptのgetDocumentByTagNameならどうでしょうか。これを確かめるため、以下のLiferay remote-appとリモートのjsファイルを作成してみました。
下記のjavascriptコードを helloworld.jsファイルに記載し、 helloworld.jsファイルをfirst-project-liferayプロジェクトの build/static/js の下に配置します。
let lfWiget = document.getElementsByTagName('lf74-test-app-root')[0];
let innerDiv = document.createElement('div');
innerDiv.innerHTML = 'Hello World!';
innerDiv.style['text-align'] =  'center';
lfWiget.appendChild(innerDiv);
そして、カスタムエレメント名lf74-test-app-rootを用いてLiferayリモートアプリを作成し、 URL:http://localhost:3000/static/js/helloworld.js と設定して、ローカルのhttpサーバから上記jsを取り込んだらこんな感じになります。

はい、外部javascriptを<script>タグで取り込む仕込みなので、当然外部スクリプトにLiferayページのエレメントが操作されます。
外部のJSはLiferayに取り込むかたちか
外部からLiferayのフロントエンドオブジェクトを利用できるのか
まずLiferayとthemeDisplayなどのfrontend-jsライブラリを試してみましょう
let lfWiget = document.getElementsByTagName('lf74-test-app-root')[0];
let innerDiv = document.createElement('div');
innerDiv.innerHTML = 'Hello World!';
innerDiv.style['text-align'] =  'center';
lfWiget.appendChild(innerDiv);

console.log(Liferay);
console.log(themeDisplay);
console.log(AUI);
その結果は:

Liferayのfrontend-jsモジュールが登録するオブジェクトにアクセスできる模様です。
描画用JSライブラリはReact以外のものを利用できるのか
最新の7.4ポータルなら、https://github.com/liferay/liferay-portalのtools/create_remote_app.shを利用すればreact、vue2またはvue3のアプリが作成できる模様です。
$ ./tools/create_remote_app.sh
Usage: create_remote_app.sh <custom-element-name> <js-framework>
  custom-element-name: liferay-hello-world
  js-framework: react, vue2, vue3
Example: create_remote_app.sh liferay-hello-world react
まとめ
Liferayのリモートアプリは外部JSを利用しLiferayのページにwebアプリを描画するポートレットです。外部JSはWeb Componentsテクノロジーを利用し、Liferayページ上の指定カスタムエレメントにJSアプリを描画できます。
うん。。微妙。
カスタマイズのアプリ開発として、jsファイルだけをリソースとして提供し、ポートレットクラスなしでアプリの作成が可能になりますが、そのため別のhttpサーバが必要(またはLiferayのリソースバンドルとして登録する)なのであまりメリットがなさそうですね。
そもそも外部JSを取り込むのは結構やばい仕組みですが、現在グローバルのトレンドはJSライブラリでフルフロントエンド描画であることを考えると、Liferay社の予想するユースケースは多分「Liferayに移行の際、追加開発をすることなく、描画のルーツエレメントだけで既存アプリをLiferay上に移植できる」、或いは「iFrameを利用せずにシンプルに外部アプリを連携する」ことなのかな?
